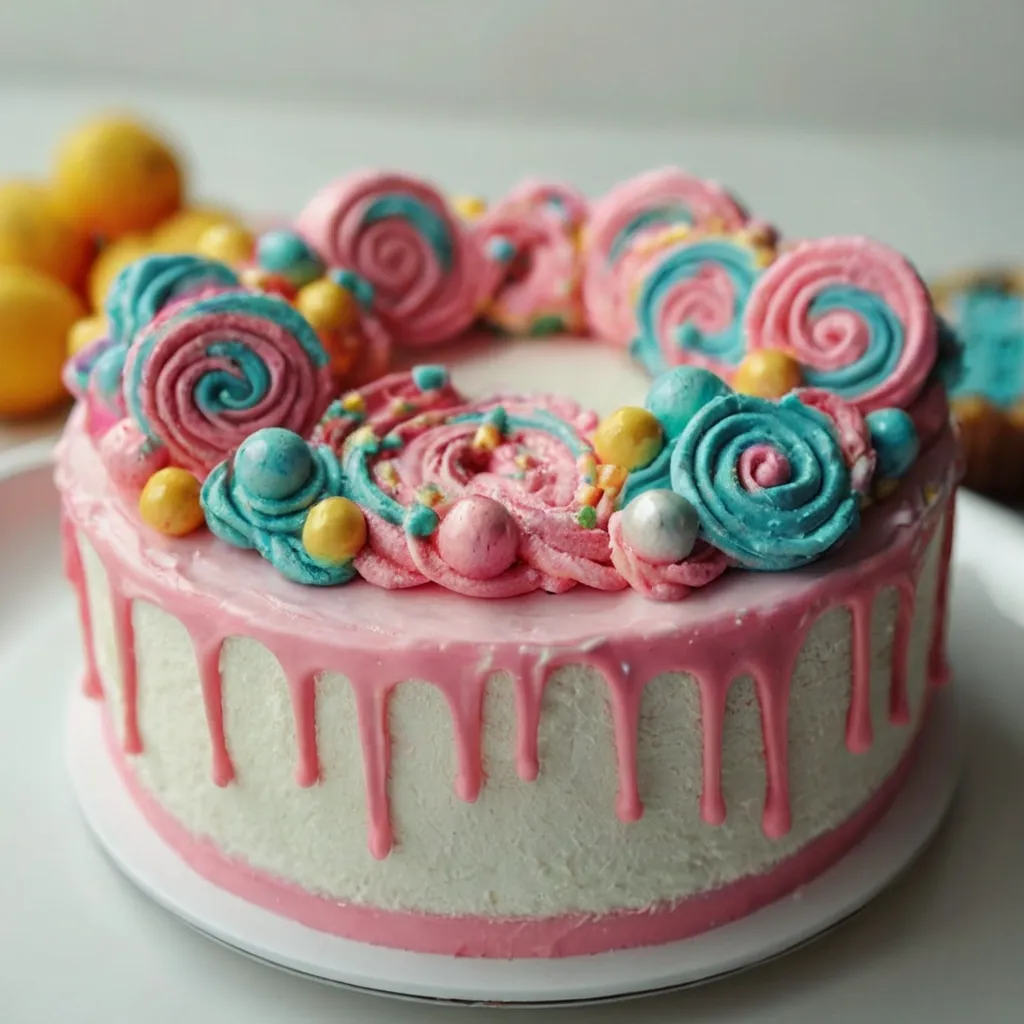
Unicorn Cake Magic Made Easy (I Promise!)
Discover the magical world of unicorn cakes! Explore creative designs, step-by-step tutorials, and tips for making your own delightful unicorn-themed treats.
Have you ever dreamed of creating a dessert that’s as magical as it is delicious? Look no further than the whimsical unicorn cake! This enchanting creation has captivated the hearts (and taste buds) of people worldwide, and today I’m sharing my foolproof unicorn cake recipe that will transform your next celebration into a magical experience.
What is a Unicorn Cake?
A unicorn cake is a colorful, fantasy-inspired dessert that captures the magical essence of these mythical creatures. Typically featuring pastel colors, swirls of rainbow frosting, a golden horn, and adorable decorative eyes and ears, these cakes have become a staple at birthday parties, baby showers, and special occasions where a touch of magic is desired.
content overview
Table of Contents
The History and Rise of Unicorn Cakes
While unicorns have been part of human mythology for thousands of years, the unicorn cake as we know it today emerged around 2016, coinciding with the broader “unicorn food” trend that swept social media platforms. Characterized by rainbow colors, sparkles, and whimsical design elements, unicorn-themed foods quickly captured the imagination of bakers and food enthusiasts worldwide.
The unicorn cake’s popularity exploded on Instagram and Pinterest, where professional and amateur bakers alike shared their magical creations. What started as a niche trend quickly became mainstream, with bakeries across the globe adding these mystical creations to their offerings.
Discover more cakes Recipes
The Appeal of Unicorn Cakes
The enduring appeal of the unicorn cake lies in its perfect blend of creativity, color, and joy. These cakes aren’t just desserts; they’re edible art pieces that:
- Create an instant “wow factor” at any celebration
- Appeal to both children and adults with their playful design
- Allow for endless customization and personal expression
- Combine multiple baking and decorating techniques in one showstopping centerpiece
- Transform ordinary moments into magical memories
Whether you’re an experienced baker or trying your hand at cake decorating for the first time, creating a unicorn cake is an achievable project that offers tremendous satisfaction. Let’s explore the different styles and approaches you can take to craft your magical masterpiece.
Different Unicorn Cake Styles
Unicorn cakes come in various styles, each with its charm and character. Here are some popular variations to inspire your creation:
Classic Unicorn Cake
The traditional unicorn cake features a colorful mane made of buttercream swirls in pastel shades, a golden fondant or chocolate horn, and fondant ears and eyes. The base is typically covered in white or light-colored frosting to represent the unicorn’s face.
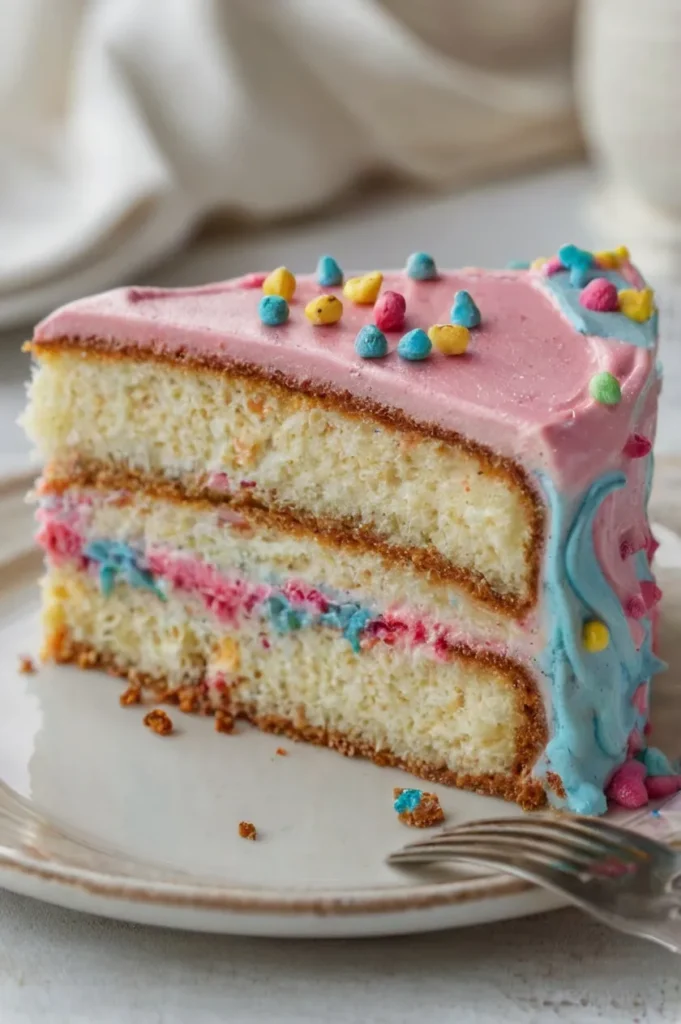
This style is perfect for beginners as it requires minimal fondant work while still creating a stunning effect.
Rainbow Unicorn Cake
For those who love bold colors, the rainbow unicorn cake takes the magical theme to the next level. This version features multiple layers of differently colored cake (creating a rainbow effect when sliced) and brighter, more vibrant colors in the frosting mane.
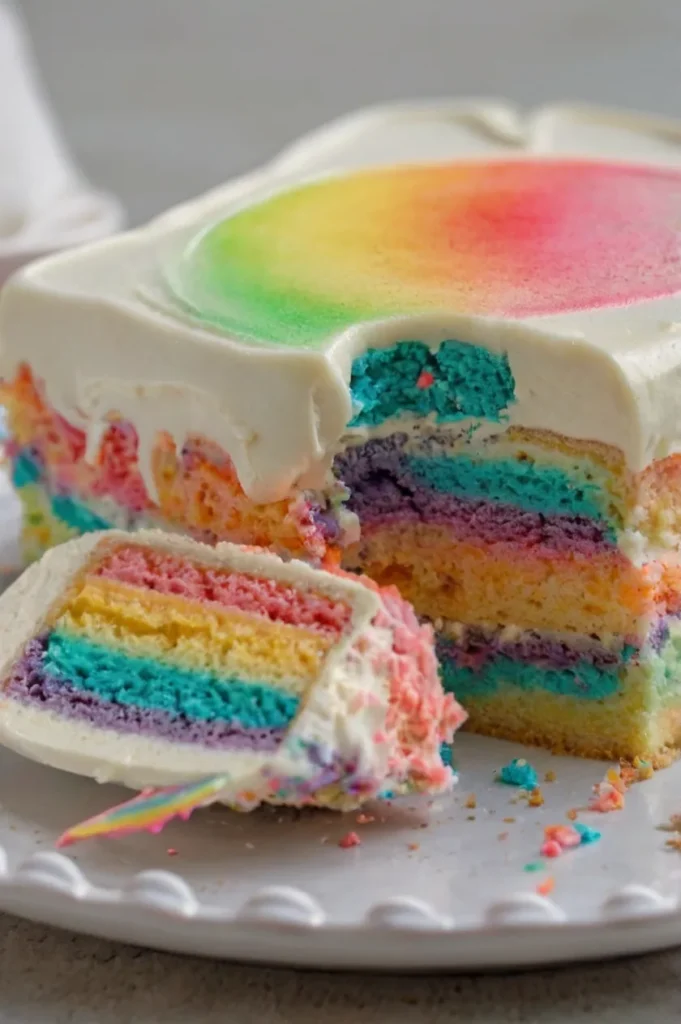
The inside-out rainbow surprise makes this cake particularly exciting for birthday celebrations.
Ingredients List for a Perfect Unicorn Cake
Creating a unicorn cake involves several components: the cake itself, buttercream frosting, and decorative elements. Here’s a comprehensive list of everything you’ll need:
For the Vanilla Cake Layers:
- 3 cups (345g) all-purpose flour
- 2 teaspoons baking powder
- 1/2 teaspoon baking soda
- 1/2 teaspoon salt
- 1 cup (226g) unsalted butter, softened
- 2 cups (400g) granulated sugar
- 4 large eggs, room temperature
- 1 tablespoon vanilla extract
- 1 cup (240ml) buttermilk, room temperature
For the Swiss Meringue Buttercream:
- 8 large egg whites (240g)
- 2 cups (400g) granulated sugar
- 3 cups (680g) unsalted butter, cubed and softened
- 2 teaspoons vanilla extract
- 1/4 teaspoon salt
- Gel food coloring (pink, purple, blue, yellow)
For the Decorations:
- Gold fondant or yellow candy melts (for the horn)
- White fondant (for the ears)
- Pink fondant or edible food coloring markers (for inner ears)
- Black fondant or edible food coloring markers (for eyes and eyelashes)
- Edible gold luster dust (for the horn)
- Clear food-grade alcohol or lemon extract (for painting gold accents)
- Sprinkles (optional, for added decoration)
Equipment Needed:
- Three 8-inch round cake pans
- Parchment paper
- Electric mixer (stand mixer preferred)
- Piping bags
- Variety of piping tips (including open star tips for the mane)
- Offset spatula
- Cake turntable (highly recommended)
- Cakeboard or serving plate
Substitutions for Dietary Restrictions:
Gluten-Free Substitutes:
- Replace all-purpose flour with an equal amount of gluten-free all-purpose flour blend containing xanthan gum
- Add 1/4 teaspoon xanthan gum if your flour blend doesn’t include it
- Bob’s Red Mill Gluten-Free 1-to-1 Baking Flour works particularly well in this recipe
Vegan Substitutes:
- Replace butter with an equal amount of vegan butter sticks (not spread)
- Replace eggs with 1/4 cup (60g) unsweetened applesauce per egg
- Substitute buttermilk with plant-based milk mixed with 1 tablespoon of apple cider vinegar
- For vegan buttercream, consider Miyoko’s vegan butter for the best results
Dairy-Free Substitutes:
- Use a dairy-free butter alternative for both cake and frosting
- Replace buttermilk with almond milk or coconut milk mixed with 1 tablespoon of lemon juice
- Earth Balance Buttery Sticks work well for both baking and frosting
Note: When using substitutes, the texture and taste may vary slightly from the original recipe. I recommend doing a small test batch if you’re making this for a special occasion.
Now that we have our ingredients ready, let’s dive into the detailed step-by-step process of creating your magical unicorn cake!
Step-by-Step Instructions for the Perfect Unicorn Cake
Part 1: Baking the Cake Layers
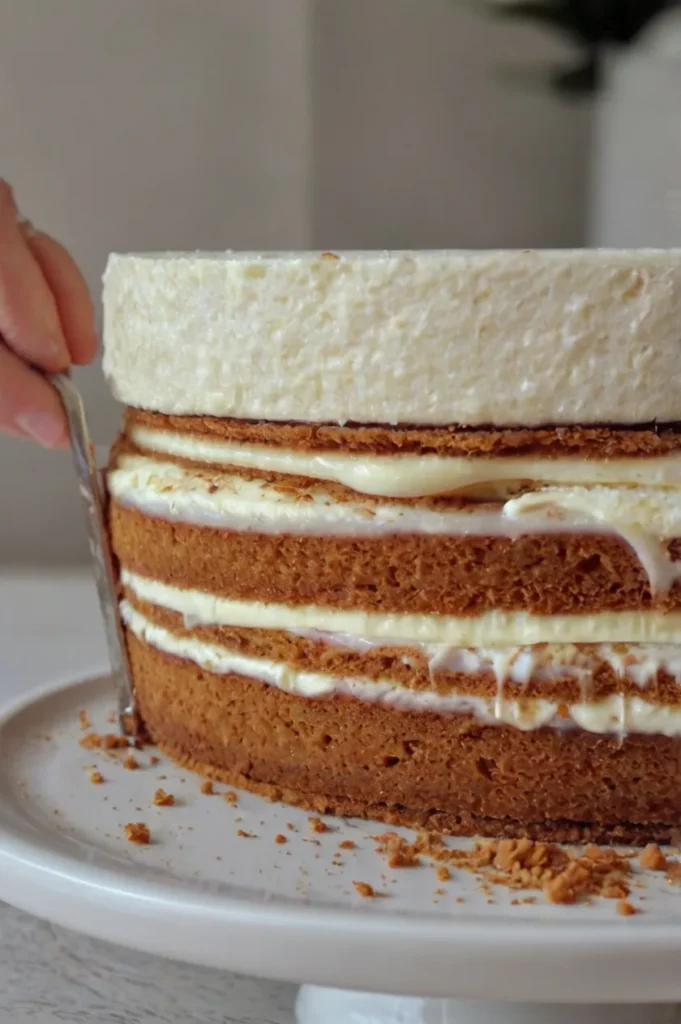
- Prepare your pans: Preheat your oven to 350°F (175°C). Grease three 8-inch round cake pans, line the bottoms with parchment paper, and grease the paper.
- Mix dry ingredients: In a medium bowl, whisk together the flour, baking powder, baking soda, and salt. Set aside.
- Cream butter and sugar: In a large bowl or stand mixer, beat the butter on medium speed until creamy (about 1 minute). Add the sugar and beat on high speed for 2 minutes until pale and fluffy.
- Add eggs and vanilla: Add eggs one at a time, beating well after each addition. Scrape down the sides of the bowl as needed. Beat in the vanilla extract.
- Alternate dry ingredients and buttermilk: With the mixer on low speed, add the dry ingredients in three additions, alternating with the buttermilk, beginning and ending with the dry ingredients. Mix until just combined after each addition.
- Divide and bake: Divide the batter evenly between the prepared cake pans, smoothing the tops with a spatula. Bake for 23-25 minutes, or until a toothpick inserted in the center comes out clean.
- Cool completely: Allow cakes to cool in the pans for 10 minutes, then turn out onto wire racks to cool completely before frosting. For best results, wrap the cooled layers in plastic wrap and refrigerate for at least an hour or overnight.
Part 2: Making the Swiss Meringue Buttercream
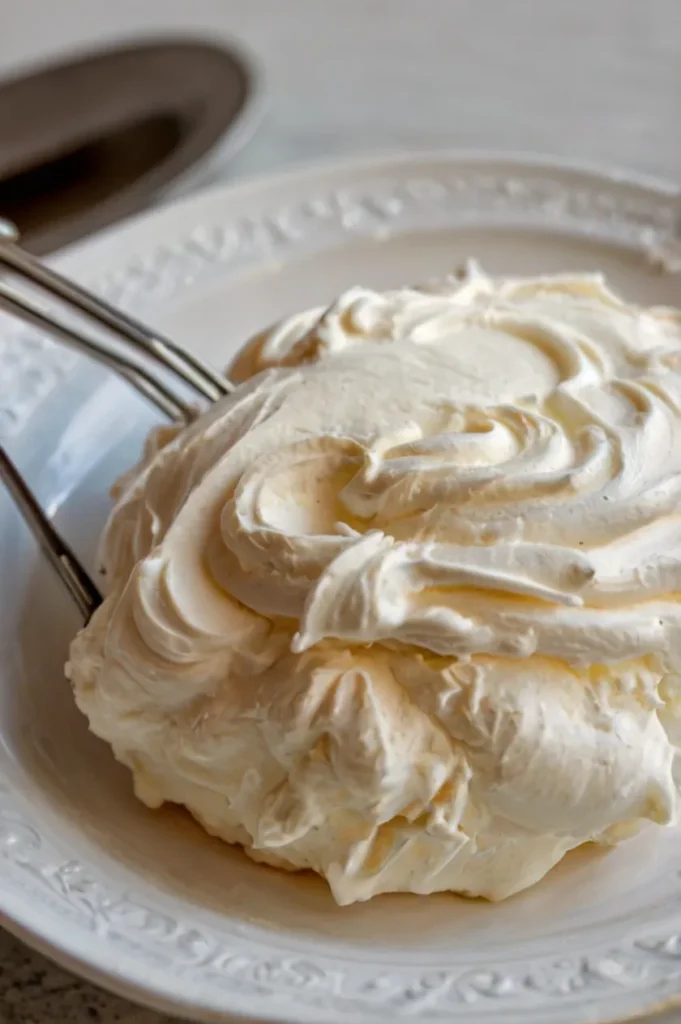
- Prepare the meringue base: Place egg whites and sugar in the heatproof bowl of your stand mixer. Set the bowl over a saucepan of simmering water (double boiler method), ensuring the bottom of the bowl doesn’t touch the water.
- Heat the mixture: Whisk constantly until the sugar is completely dissolved and the mixture reaches 160°F (71°C) on an instant-read thermometer.
- Whip to stiff peaks: Transfer the bowl to your stand mixer fitted with the whisk attachment. Beat on high speed until stiff, glossy peaks form and the bottom of the bowl feels cool to the touch (about 10 minutes).
- Add butter: Switch to the paddle attachment. With the mixer on medium speed, add butter a few cubes at a time, allowing each addition to incorporate before adding more.
- Continue mixing: Once all butter is added, the mixture might look curdled—don’t panic! Continue beating until it comes together as a smooth, silky frosting (this can take 5-10 minutes).
- Add flavorings: Beat in vanilla extract and salt until fully incorporated.
- Divide and color: Reserve about 2/3 of the buttercream in white for covering the cake. Divide the remaining 1/3 into four smaller portions and tint each with gel food coloring to create pastel pink, purple, blue, and yellow.
Part 3: Creating the Unicorn Horn and Ears
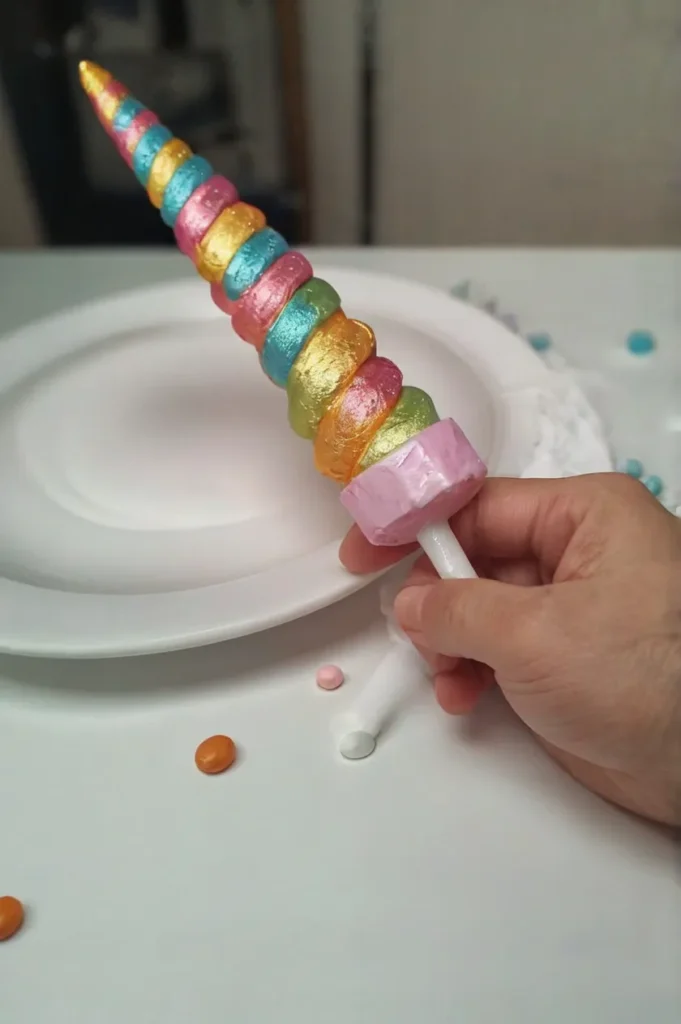
- Form the horn: Roll gold fondant or melted and cooled yellow candy melts into a cone shape about 4-5 inches long, tapering to a point. Insert a toothpick into the base for stability.
- Create texture: Use a small knife or toothpick to create spiral indentations around the horn.
- Add shimmer: If using fondant, brush with clear alcohol or lemon extract mixed with gold luster dust to create a metallic finish. Allow to dry completely.
- Make the ears: Roll out white fondant to about 1/8 inch thickness. Cut two teardrop shapes for the outer ears.
- Add inner ears: Roll out a small amount of pink fondant, cut smaller teardrop shapes, and attach to the white fondant with a tiny amount of water.
- Shape and dry: Gently pinch the base of each ear and curve slightly. Place over a curved surface (like a rolling pin or bunched aluminum foil) to dry overnight.
Part 4: Assembling and Decorating the Cake
- Level cake layers: Using a serrated knife, level the tops of your cake layers if needed to create flat surfaces.
- Create base layer: Place the first cake layer on a cake board or serving plate. Spread a generous layer of white buttercream on top.
- Build the cake: Add the second layer, more frosting, then the final layer, making sure the layers are aligned.
- Crumb coat: Apply a thin layer of white buttercream all over the cake to seal in crumbs. Refrigerate for 20-30 minutes until firm.
- Final coating: Apply a thicker, smooth layer of white buttercream to the entire cake. Use a bench scraper or offset spatula to create a smooth finish.
- Prepare for decoration: Transfer the colored buttercream into piping bags fitted with star tips.
- Create the mane: Pipe swirls of colored buttercream around the top edge and down one side of the cake, alternating colors to create a rainbow mane effect.
- Add facial features: Position the fondant ears on top of the cake. Insert the unicorn horn at the center of the mane.
- Create eyes: Use black fondant or edible markers to create closed eyes with eyelashes on the front of the cake.
- Final touches: Add optional sprinkles around the base of the horn and mane for extra sparkle.
Congratulations! You’ve created a magical unicorn cake that’s ready to be the centerpiece of your celebration!
Troubleshooting: Common Unicorn Cake Problems and Solutions
Even experienced bakers encounter challenges. Here are solutions to common issues when making a unicorn cake:
Discover more cakes Recipes
Cake Issues
| Problem | Possible Cause | Solution |
|---|---|---|
| Cake is dense or sunken in the middle | Overmixing the batter or opening the oven door too early | Mix just until ingredients are combined; avoid opening the oven during the first 20 minutes of baking |
| Cake layers are domed | Oven temperature too high | Use cake strips around the pans or lower oven temperature by 25°F |
| Oven temperature is too high | Overbaking or inaccurate measurements | Use a timer and check with a toothpick; consider using a kitchen scale for precise measurements |
| Layers sliding during assembly | The cake is dry | Chill layers before assembling; use less filling; insert support dowels if needed |
Buttercream Issues
| Problem | Possible Cause | Solution |
|---|---|---|
| Buttercream is curdled | Butter too cold or added too quickly | Keep mixing! It will come together; if needed, warm the bowl gently with a hairdryer |
| Buttercream is too soft | Butter too warm or kitchen too hot | Refrigerate for 15-20 minutes, then rewhip; add up to 1/2 cup more powdered sugar if necessary |
| Colors bleeding together | Frosting too soft or decorating too quickly | Butter is too cold or added too quickly |
| Buttercream melting | Chill the cake between adding different colored swirls; ensure buttercream is the proper consistency | Work in a cool environment; refrigerate cake frequently during decoration |
Decoration Issues
| Problem | Possible Cause | Solution |
|---|---|---|
| Horn won’t stay upright | Not enough support or too heavy | Use a thicker toothpick or skewer; make the horn with a lighter material like rice krispie treats covered in fondant |
| Ears drooping | Piped decorations are losing shape | Make ears thicker at the base; allow more drying time before placing on cake |
| Fondant decorations cracking | Fondant dried out or handled too roughly | Keep unused fondant covered; handle gently; add a tiny bit of vegetable shortening when kneading |
| Piped decorations losing shape | Buttercream too soft or wrong piping tip | Chill buttercream slightly before piping; use proper star tips for mane swirls |
Tips and Tricks from Expert Bakers
After creating dozens of unicorn cakes and consulting with professional bakers, I’ve gathered these expert tips to help you achieve the best results:
For Perfect Cake Layers:
- Room temperature ingredients: This isn’t just baking folklore—room temperature ingredients truly incorporate better, creating a smoother batter and more uniform cake texture.
- Invest in quality pans: Heavy, light-colored aluminum pans distribute heat more evenly than dark or thin pans.
- Measure precisely: For consistent results, use a kitchen scale rather than volume measurements, especially for flour, which can easily be compacted.
- Create flat layers: Use cake strips (dampened strips wrapped around the outside of pans) for perfectly flat layers that require minimal trimming.
For Silky Buttercream:
- Temperature matters: The perfect temperature for butter in Swiss meringue buttercream is 65-70°F (18-21°C)—cool but pliable.
- Don’t rush: Allow the meringue to cool completely before adding butter to prevent melting.
- Patience pays off: If your buttercream looks curdled, keep mixing! It almost always comes together eventually.
- Color gradually: Add gel colors a little at a time—they’re concentrated, and you can always add more but can’t take it away.
For Stunning Decorations:
- Plan your design: Sketch your unicorn design before starting to decorate so you have a clear vision.
- Chill between steps: Refrigerating the cake for 15-20 minutes between major decorating stages helps prevent smudging and sliding.
- Pipe practice swirls: Test your colored buttercream consistency and piping technique on parchment paper before applying to the cake.
- Pre-position elements: Lightly mark where the eyes, ears, and horns will go using a toothpick before placing them permanently.
Time-Saving Shortcuts:
- Prepare in advance: Make the fondant horn and ears 2-3 days ahead to allow proper drying time.
- Cake layers can wait: Bake cake layers up to a week ahead, wrap well in plastic wrap, and freeze until needed. Thaw in refrigerator overnight before assembling.
- Buttercream buffer: Swiss meringue buttercream can be made 3-5 days in advance and stored in the refrigerator. Bring to room temperature and rewhip before using.
- Create a decorating timeline: For complex designs, spread the work over two days—bake and crumb coat on day one, final decorating on day two.
Unicorn Cake Variations to Inspire Your Creativity
One of the joys of making a unicorn cake is the endless possibilities for customization. Here are some inspiring variations to make your unicorn cake unique:
Flavor Variations:
- Rainbow Cake Layers: Color each cake layer differently for a rainbow surprise when sliced.
- Funfetti Cake: Add colorful sprinkles to the batter for a festive interior.
- Chocolate Unicorn: Use chocolate cake layers with vanilla buttercream for a delicious contrast.
- Lemon-Lavender Unicorn: Infuse cake with lemon zest and lavender buds for a sophisticated flavor profile.
- Strawberry Unicorn: Add freeze-dried strawberry powder to both cake and some of the buttercream for a natural pink color and delicious berry flavor.
Filling Variations:
- Fruit Preserves: Layer strawberry, raspberry, or blueberry preserves between cake layers.
- Chocolate Ganache: Add a layer of rich chocolate ganache between cake layers.
- Cream Cheese Filling: Substitute one layer of buttercream filling with stabilized cream cheese frosting.
- Lemon Curd: Add a tangy surprise with homemade lemon curd between layers.
- Cookies and Cream: Mix crushed chocolate sandwich cookies into buttercream for a cookies-and-cream layer.
Decoration Variations:
- Drip Effect: Add a colorful candy melt drip around the top edge of the cake.
- Flower Crown: Create a crown of buttercream flowers around the horn.
- Metallic Details: Add edible gold or silver leaf accents to the horn and around the cake.
- Themed Unicorn: Customize colors to match a party theme or favorite colors.
- Unicorn with Open Eyes: Create a unicorn face with open eyes and longer lashes for a different expression.
Recipe for Unicorn Cupcakes
Want the magic of a unicorn cake in individual servings? These unicorn cupcakes are perfect for parties or when you need a more portable option:
Ingredients (Makes 24 cupcakes):
- 2⅔ cups (305g) all-purpose flour
- 2 cups (400g) granulated sugar
- 2½ teaspoons baking powder
- ½ teaspoon salt
- ¾ cup (170g) unsalted butter, softened
- 4 large egg whites, room temperature
- 1 cup (240ml) whole milk, room temperature
- 2 teaspoons vanilla extract
- Swiss meringue buttercream (from main recipe)
- Decorations (miniature fondant horns and ears)
Instructions:
- Prepare cupcake pans: Preheat oven to 350°F (175°C). Line two 12-cup muffin pans with cupcake liners.
- Mix dry ingredients: In a large bowl, whisk together flour, sugar, baking powder, and salt.
- Add butter: Add the softened butter and mix on low speed until the mixture resembles coarse crumbs.
- Combine wet ingredients: In a separate bowl, whisk together egg whites, milk, and vanilla.
- Create batter: Gradually add the wet ingredients to the dry ingredients, mixing until just combined.
- Bake: Fill cupcake liners about ⅔ full. Bake for 18-20 minutes or until a toothpick inserted comes out clean.
- Cool completely: Allow to cool in pans for 5 minutes, then transfer to wire racks to cool completely.
- Decorate: Pipe white buttercream onto cooled cupcakes. Add a small swirl of colored buttercream for the mane, and top with miniature fondant horns and ears.
These adorable mini unicorns are perfect for children’s parties or as a magical treat for any occasion!
Discover more cakes Recipes
Frequently Asked Questions (FAQ)
After years of creating unicorn cakes and teaching others how to make them, here are the questions I’m most commonly asked:
Can I make this unicorn cake in advance?
Yes! You can make components ahead of time:
- Cake layers can be baked 1-2 days ahead, wrapped tightly in plastic wrap and refrigerated
- Fondant decorations (horn and ears) should be made 2-3 days ahead to allow proper drying time
- Buttercream can be made 3-5 days ahead and stored in the refrigerator (bring to room temperature and rewhip before using)
- The fully assembled cake is best made no more than 24 hours before serving
How do I store a unicorn cake?
Store your finished unicorn cake in the refrigerator, but serve at room temperature for the best flavor and texture. The cake can be refrigerated for up to 5 days, though the decorative elements may begin to soften after 2-3 days.
Can I freeze unicorn cake?
You can freeze undecorated cake layers for up to 2 months, wrapped tightly in plastic wrap and aluminum foil. However, I don’t recommend freezing a fully decorated unicorn cake as the fondant and buttercream decorations may not thaw well.
What if I don’t have piping tips?
While proper piping tips create the most professional look, you can create a simplified unicorn cake by:
- Using a zip-top bag with the corner snipped off
- Creating a rough mane with an offset spatula
- Using store-bought decorations for the horn and ears
How do I transport a unicorn cake safely?
Transport in a sturdy cake box with a non-slip surface beneath the cake board. Use dowels inserted through the cake for stability if traveling a long distance. Keep the car cool and drive carefully to avoid sudden movements.
My buttercream is too soft. What can I do?
If your buttercream is too soft to hold its shape, refrigerate it for 15-20 minutes, then rewhip. You may need to repeat this process in very warm environments. Adding a small amount of powdered sugar can also help stabilize the frosting.
Can I make a dairy-free or vegan unicorn cake?
Absolutely! See the substitutions section in the ingredients list. The cake and decorations can be adapted to accommodate various dietary restrictions while maintaining the magical unicorn design.
What’s the best way to achieve vibrant colors in the mane?
Use gel food coloring rather than liquid food coloring for more intense colors without affecting the consistency of your buttercream. Remember that colors will deepen slightly over time, so start lighter than your desired final shade.
Conclusion
Creating a unicorn cake is more than just baking—it’s crafting an edible piece of magic that brings joy and wonder to any celebration. Whether you’re making this enchanting dessert for a child’s birthday, a baby shower, or simply because unicorns make everything better, the process should be as enjoyable as the finished product.
Remember that each unicorn cake is unique, just like the mythical creatures themselves. Don’t aim for perfection; instead, embrace the creative process and have fun with it. Your cake will have its personality and charm, making it all the more special.
I hope this comprehensive guide has given you the confidence and inspiration to create your unicorn cake masterpiece. From the perfect vanilla cake layers to the silky buttercream swirls and adorable decorative elements, you now have all the knowledge you need to bring this magical dessert to life.
I’d love to see your unicorn cake creations! Share photos in the comments below or tag me on social media with #MagicalUnicornCake.
Have you made this recipe? What occasion did you celebrate with your unicorn cake? Did you try any variations or come up with creative solutions to challenges? Your experiences and tips could help other bakers on their magical unicorn cake journey!
Subscribe to my newsletter for more magical baking inspiration, seasonal recipes, and exclusive content delivered straight to your inbox. And don’t forget to pin this recipe for later—your future self will thank you when unicorn cake inspiration strikes!
Happy baking, and may your unicorn cake bring as much joy to your celebration as it does to those who are lucky enough to enjoy it!

