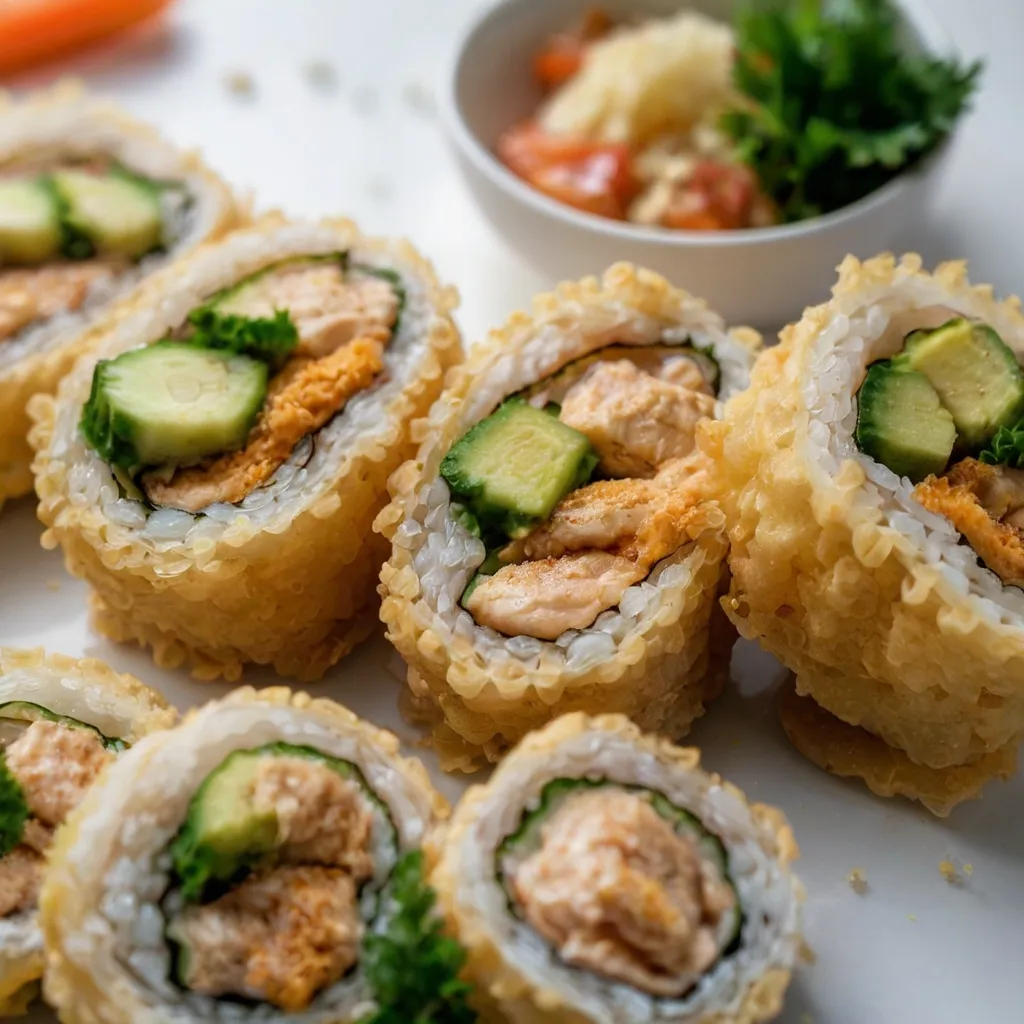
How to Make the Perfect Chicken Tempura Roll – Crispy & Delicious
Learn how to create a mouthwatering Chicken Tempura Roll at home with our step-by-step guide. Master this crispy Japanese favorite using fresh ingredients and expert techniques.
There’s something truly magical about biting into a perfectly crafted Chicken Tempura Roll. That exquisite crunch of golden-fried chicken wrapped in seasoned sushi rice and crisp nori creates an explosion of textures and flavors that’s simply irresistible. If you’ve been intimidated by making sushi at home or thought Chicken Tempura Rolls were best left to the professionals, I’m here to change your mind! This comprehensive guide will walk you through creating restaurant-quality Chicken Tempura Rolls in your kitchen—for a fraction of the cost and with the added benefits of freshness and customization that takeout simply can’t match.
What is a Chicken Tempura Roll?
A Chicken Tempura Roll is a popular style of sushi that features crispy tempura-battered and fried chicken as its star ingredient. Unlike traditional Japanese sushi that often features raw fish, this contemporary roll contains fully cooked chicken encased in seasoned sushi rice and wrapped in nori (seaweed). The chicken is coated in a light, airy tempura batter before frying, giving it that signature crunch that contrasts beautifully with the soft rice. These rolls are typically served with dipping sauces like soy sauce, spicy mayo, or eel sauce, and may contain additional fillings like avocado, cucumber, or cream cheese.
content overview
Table of Contents
Why You’ll LOVE This Chicken Tempura Roll Recipe
- Perfectly Crispy Chicken Every Time
- Fluffy, Perfectly Seasoned Sushi Rice
- Easy-to-Follow Rolling Technique (with video!)
- Customizable Fillings & Sauces
- Impressive Results for Guests (or just yourself!)
- Clear Steps for Beginners
Key Ingredients & Equipment
Equipment Needed:
- Sushi Rolling Mat (Makisu)
- Sharp Knife
- Large Pot or Deep Fryer
- Slotted Spoon/Spider
- Bowls
- Measuring Cups/Spoons
- Rice Cooker (optional but recommended)
Ingredient Breakdown
For the Chicken Tempura:
Chicken: The foundation of our Chicken Tempura Roll deserves careful consideration. You have two excellent options:
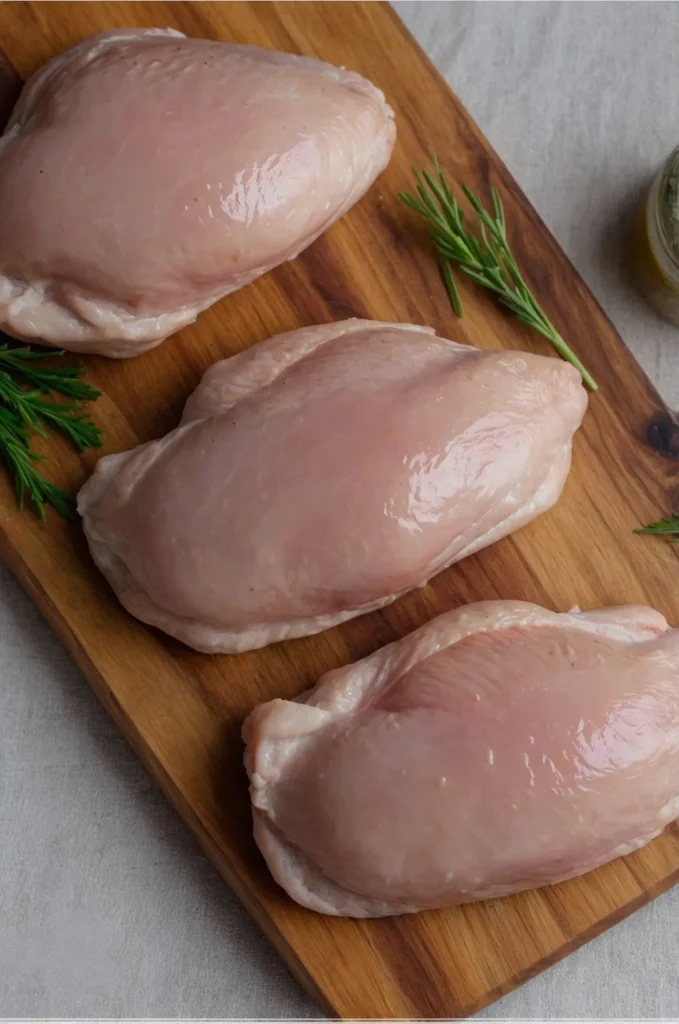
- Boneless, skinless chicken breast: Leaner with a milder flavor profile that allows the tempura coating and sushi seasonings to shine. Cut against the grain into strips about 1/2-inch thick for the perfect bite-sized pieces.
- Boneless, skinless chicken thigh: Naturally more flavorful and juicier, less likely to dry out during frying. While slightly higher in fat content, many chefs prefer thighs for their superior moisture retention and forgiving nature during cooking.
Tempura Batter: The secret to that ethereal crispiness lies in your tempura batter approach:
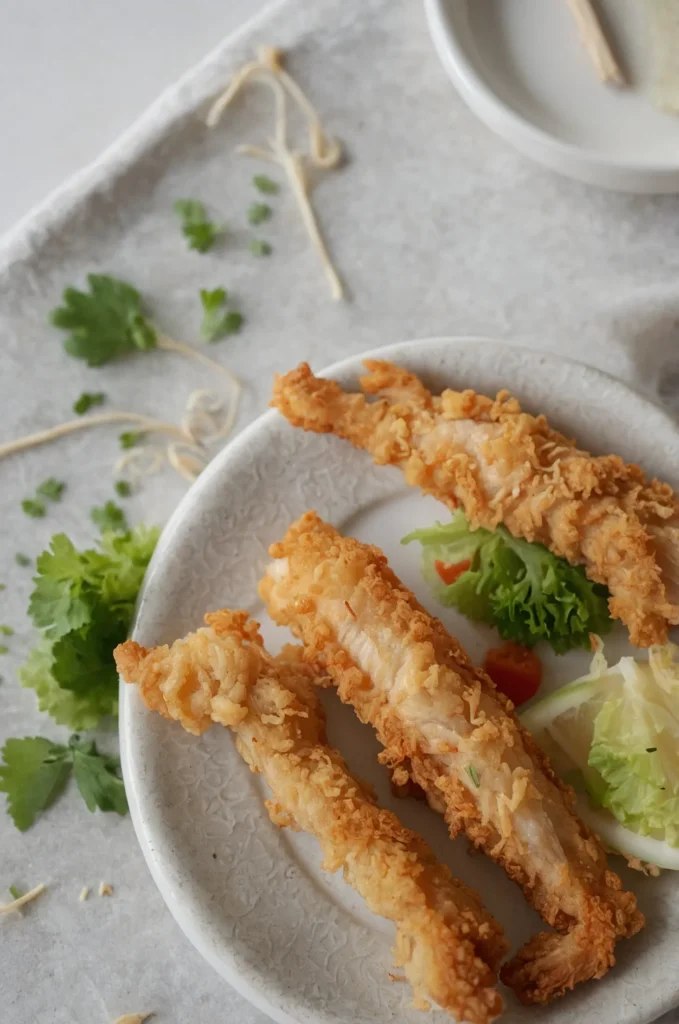
Option 1: Quickest (Using Box Mix) For those short on time or new to tempura, a quality box mix (like Kikkoman or House Foods) provides consistent results with minimal effort. Simply add ice-cold water according to package directions, being careful not to overmix.
Discover more Chicken Recipes
Option 2: Homemade (Better Control) For tempura purists, making your own batter allows complete control over texture and flavor:
- 1 cup cake flour (preferred for its lower gluten content, creating a lighter coating)
- 2 tablespoons cornstarch (the key to extra crispiness)
- 1 large egg, beaten
- 1 cup ice-cold sparkling water (the carbonation and cold temperature are crucial!)
The science behind perfect tempura lies in minimal gluten development and rapid steam expansion. The cold carbonated water creates tiny air bubbles that expand rapidly when hitting hot oil, while the cornstarch restricts gluten formation. This results in that signature light, crispy coating rather than a heavy, doughy one.
Frying Oil: Not all oils are created equal when it comes to tempura:
- Peanut oil offers a clean flavor and an excellent high smoke point (450°F/232°C)
- Canola oil provides a neutral taste and good heat tolerance (400°F/204°C)
- Vegetable oil blends are economical and widely available (around 400°F/204°C)
Temperature control is paramount—too cool and your tempura absorbs oil, becoming greasy; too hot and it burns before cooking through. The sweet spot is 350-375°F (175-190°C).
For the Sushi Rice:
Rice: This is non-negotiable! You must use short-grain Japanese sushi rice (sometimes labeled as “sushi rice” or “Calrose rice”). Its higher starch content creates that sticky-yet-distinct texture that defines proper sushi. Long-grain varieties like jasmine or basmati will fall apart when rolling due to their drier, fluffier texture.
Rinsing your rice isn’t optional—it’s essential for removing excess surface starch that would otherwise make your rice gummy rather than pleasantly sticky. Rinse until the water runs nearly clear.
Sushi Vinegar (Sushi-zu): This seasoned vinegar mixture transforms plain rice into proper sushi rice, providing flavor, preservation qualities, and the right texture. While pre-made options exist, homemade allows perfect customization:
- 1/4 cup rice vinegar
- 2 tablespoons sugar
- 1 teaspoon salt
Heat gently in a small saucepan until sugar and salt dissolve completely (do not boil). Cool before adding to hot rice. This mixture adds the subtle tangy-sweet flavor profile authentic to sushi while helping preserve the rice, an important consideration in sushi’s historical development before refrigeration.
For Assembly:
Nori Seaweed Sheets: Select premium-grade nori for the best experience—lower quality sheets can be tough, fishy, or fall apart during rolling. Quality nori should have a deep black-green color and a slight sheen. Some chefs prefer quickly passing the nori over an open flame to lightly toast it, enhancing flavor and making it more pliable.
Optional Fillings: The beauty of homemade sushi is customization! Consider these classic additions:
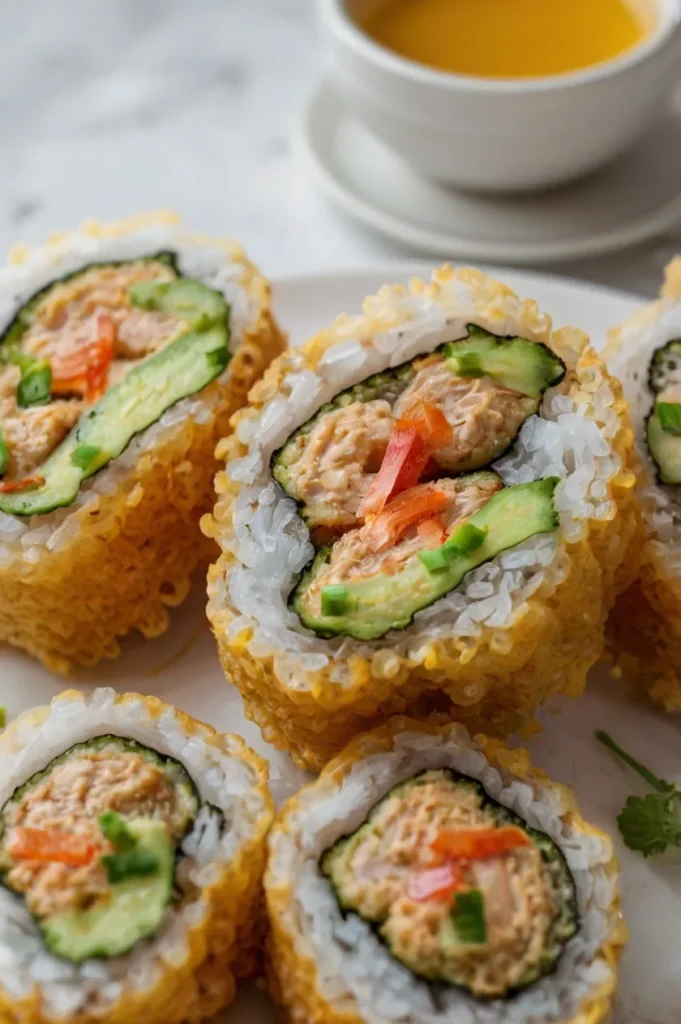
- Avocado slices provide creamy richness
- Cucumber strips add a refreshing crunch
- Cream cheese creates indulgent creaminess
- Crisp lettuce introduces extra texture and freshness
For Serving:
Traditional Accompaniments:
- Soy sauce (consider low-sodium for better flavor balance)
- Wasabi (fresh is incredible if you can find it, but quality prepared paste works well)
- Pickled ginger (gari) for palate cleansing between bites
Bonus Sauces:
Eel Sauce (Unagi Sauce): This sweet-savory glaze elevates any sushi roll. Store-bought works well, or make your own by simmering 1/4 cup soy sauce, 1/4 cup mirin, 2 tablespoons sugar, and 2 tablespoons sake until reduced by half.
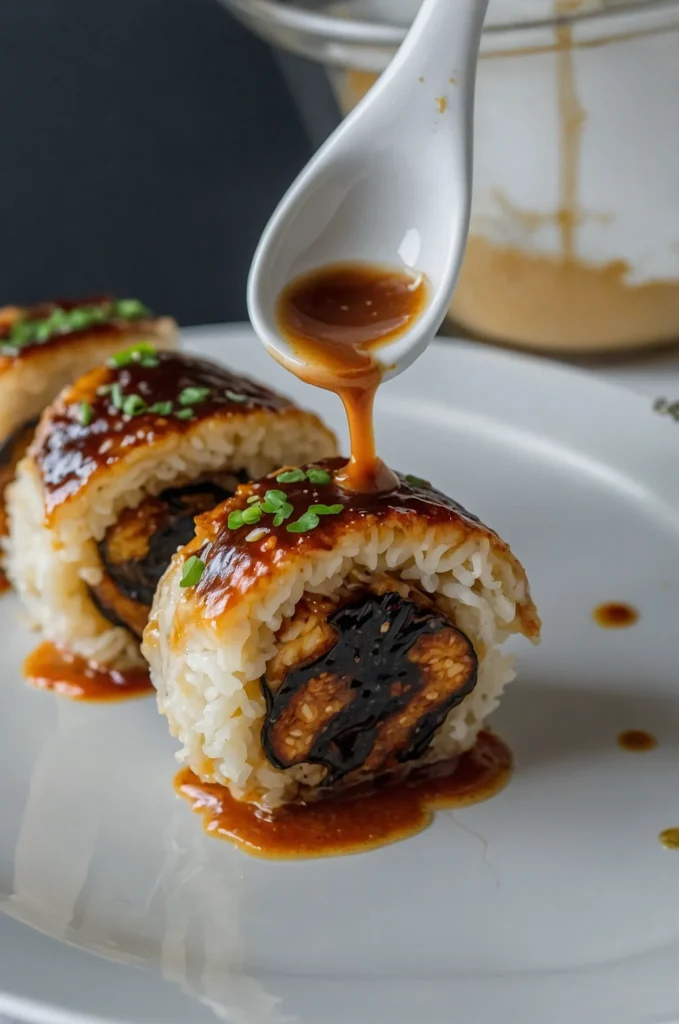
Spicy Mayo: Simply mix 3 tablespoons quality mayonnaise with 1-2 teaspoons sriracha and a few drops of fresh lime juice for the perfect creamy-spicy condiment.
Discover more Chicken Recipes
How to Make Chicken Tempura Rolls: Step-by-Step
Phase 1: Prepare the Perfect Sushi Rice
- Measure 2 cups of short-grain Japanese sushi rice into a large bowl.
- Rinse the rice thoroughly, changing water 4-5 times, gently agitating with your fingers until water runs almost clear.
- Drain rice in a fine-mesh strainer for 15 minutes to remove excess water.
- For rice cooker method: Combine rinsed rice with 2 cups cold water in the rice cooker and cook according to the manufacturer’s instructions.
- For stovetop method: Combine rice with 2¼ cups cold water in a heavy-bottomed pot. Bring to a boil, reduce heat to lowest setting, cover, and simmer for 15 minutes. Remove from heat but keep covered for an additional 10 minutes.
- Transfer the hot rice to a wide, non-metallic bowl (wooden is traditional, but glass works well).
- Drizzle the prepared sushi vinegar mixture evenly over the rice.
- Using a flat wooden paddle or rice paddle, slice through the rice at a 45-degree angle, folding and turning to distribute the vinegar mixture without mashing the grains.
- Fan the rice gently while mixing to help it cool more quickly and develop a glossy appearance.
- Cover with a clean, damp kitchen towel until ready to use (ideally at room temperature).
Phase 2: Prepare the Chicken
- Pat chicken pieces dry thoroughly with paper towels to ensure proper batter adhesion.
- Slice chicken into strips approximately ½-inch thick and 3-4 inches long, cutting against the grain for tenderness.
- Season lightly with a pinch of salt and freshly ground black pepper.
- Place prepared chicken strips on a plate and refrigerate while preparing the batter and heating the oil.
Phase 3: Make the Tempura Batter & Fry the Chicken
- If using box tempura mix, prepare according to package directions using ice-cold water. Keep the bowl over another larger bowl filled with ice to maintain temperature.
- If making homemade batter, whisk the egg in a medium bowl, then add the ice-cold sparkling water.
- In a separate bowl, whisk together the cake flour, cornstarch, and a pinch of salt.
- Add the dry ingredients to the wet ingredients and mix with chopsticks or a fork just until combined—about 15-20 quick strokes. The batter should remain slightly lumpy; overmixing develops gluten and makes heavy tempura.
- Heat oil in a deep pot or fryer to 350°F (175°C). Verify temperature with a cooking thermometer for best results.
- Test the oil with a drop of batter—it should sizzle and rise to the surface immediately.
- Working in small batches (3-4 pieces at a time), dip chicken strips into the batter, allowing excess to drip off for 2-3 seconds.
- Carefully lower battered chicken into hot oil and fry for 2-3 minutes until golden brown and chicken is cooked through (internal temperature of 165°F/74°C).
- Remove with a slotted spoon or spider and place on a wire cooling rack positioned over a baking sheet—not paper towels, which trap steam and compromise crispiness.
- Allow chicken tempura to cool slightly while preparing your rolling station.
Phase 4: Assemble the Sushi Rolls
- Place your bamboo sushi mat on a clean work surface, optionally covering it with plastic wrap to prevent sticking.
- Cut a full-size nori sheet in half and place one half on the mat, shiny side down, with the longer edge parallel to the bottom of the mat.
- Wet your hands in a bowl of water mixed with a teaspoon of rice vinegar to prevent sticking.
- Take approximately ¾ cup of prepared sushi rice and spread it evenly across the nori, leaving a ½-inch border at the top edge uncovered.
- Apply gentle pressure to ensure rice adheres to nori without smashing the grains.
- Arrange 2-3 pieces of chicken tempura in a horizontal line across the bottom third of the rice-covered nori.
- Add any additional fillings (avocado, cucumber, etc.) alongside the chicken in a neat row.
- Using your thumbs and forefingers, lift the bottom edge of the mat and fold it over the fillings, tucking the edge of the nori to start the roll.
- Apply firm, even pressure along the length of the roll to compress ingredients as you continue rolling forward.
- Roll forward in small increments, using the mat to shape and tighten the roll until you reach the uncovered nori border.
- Moisten the bare nori edge with a dab of water to help seal the roll.
- Complete the rolling process, applying gentle pressure to seal the roll and finalize its cylindrical shape.
Phase 5: Slice and Serve
- Allow the completed roll to rest for 1-2 minutes before cutting to help it set.
- Wet a very sharp knife with water or lightly coat with oil to prevent sticking.
- With a single confident motion, cut the roll in half.
- Place the halves side by side and cut each into 3 equal pieces, creating 6 pieces total per roll.
- Wipe the knife clean between cuts for the cleanest presentation.
- Arrange sushi pieces on a serving plate, standing them up to display the beautiful cross-section of ingredients.
- Serve immediately with small dishes of soy sauce, wasabi, pickled ginger, and your choice of specialty sauces.
Pro Tips for the BEST Chicken Tempura Rolls
- Keep Batter Ice Cold: Place your mixing bowl in another bowl filled with ice water while preparing and using your batter.
- Don’t Overmix Batter: Those lumps are your friends! They create the light, crispy texture that tempura is famous for.
- Maintain Oil Temperature: Add chicken in small batches to avoid dramatically dropping the oil temperature, which results in greasy tempura.
- Fry in Batches: Overcrowding the pot causes the oil temperature to drop too quickly and prevents proper cooking.
- Sushi Rice is Key: The difference between good and great sushi is often in the rice preparation—don’t rush this step!
- Wet Your Hands & Knife: Rice sticks to everything! Keep a bowl of vinegar-water nearby for frequent hand rinsing.
- Roll Tightly but Gently: Finding this balance takes practice. Too loose and your roll falls apart; too tight and ingredients get squished.
- Slice with Confidence: Hesitant cutting tears the nori and squishes the roll. Use a single, confident stroke for each cut.
Fun Variations
Chicken Tempura Rolls are wonderfully versatile! Try these delicious variations:
Veggie-Loaded Roll: Add thin matchsticks of carrot, bell pepper, and zucchini alongside your chicken for extra nutrition and color contrast.
Spicy Chicken Tempura Roll: Mix your fried chicken pieces with a bit of spicy mayo before adding to your roll for an extra kick of heat throughout.
Inside-Out Roll (Uramaki): Place the rice on the outside and the nori inside for a different visual approach and texture experience. Roll the exterior in toasted sesame seeds for extra flavor and presentation points.
California-Style: Add avocado and imitation crab to your chicken tempura for a fusion approach that combines two popular roll styles.
Baked Chicken Option: For a lighter version, bread chicken strips with panko and bake at 425°F (220°C) until golden and cooked through. While not traditional tempura, this offers a less oil-intensive alternative.
Chicken Tempura Roll FAQ
Is Chicken Tempura Roll cooked?
Yes, the Chicken Tempura Roll is completely cooked. The chicken is fully fried in tempura batter until it reaches a safe internal temperature of 165°F (74°C). This makes Chicken Tempura Rolls an excellent sushi option for those who prefer not to eat raw fish or for pregnant women avoiding raw seafood.
Discover more Chicken Recipes
What sauce goes best with Chicken Tempura Roll?
While personal preference varies, the most popular sauces for Chicken Tempura Rolls include:
- Soy sauce (traditional and always appropriate)
- Eel sauce (unagi sauce) – offers sweet and savory notes that complement the crispy chicken
- Spicy mayo – adds a creamy heat that enhances without overwhelming the chicken
- Ponzu sauce – a citrus-infused soy sauce that adds brightness to the rich tempura
Many sushi lovers enjoy combining two or more sauces for a customized flavor experience.
Can I make Chicken Tempura Rolls ahead of time?
Chicken Tempura Rolls are best enjoyed immediately after preparation for optimal texture. However, you can prepare components separately ahead of time:
- Sushi rice can be made up to 4 hours ahead and kept at room temperature (not refrigerated, which hardens the rice).
- Chicken can be fried up to 2 hours ahead and kept warm in a 200°F (93°C) oven on a wire rack.
- Vegetable fillings can be prepared the day before and refrigerated.
Fully assembled rolls can be wrapped tightly in plastic wrap and refrigerated for up to 2 hours, but the tempura will lose some crispness and the rice may become slightly firm.
Is Chicken Tempura Roll healthy?
Chicken Tempura Rolls offer a mix of nutritional benefits and considerations:
Pros:
- Protein-rich chicken provides essential amino acids
- Vegetable fillings contribute vitamins and fiber
- Brown sushi rice can be substituted for added whole grains
Considerations:
- The tempura frying process adds fat and calories
- White sushi rice has a high glycemic index
- Soy sauce contains significant sodium
For a healthier version, consider using the baked chicken variation, adding extra vegetables, choosing brown rice, and being mindful of sauce portions.
How do I keep my tempura crispy?
To maintain that perfect crunch:
- Ensure your oil is hot enough (350-375°F/175-190°C)
- Don’t overcrowd the frying pot
- Drain on a wire rack instead of paper towels
- Allow slight cooling before rolling to prevent steam from softening the coating
- Serve immediately after preparation
- If holding briefly before serving, place in a single layer in a warm (200°F/93°C) oven on a wire rack
The Ultimate Chicken Tempura Roll Recipe
The perfect blend of crispy tempura chicken, seasoned sushi rice, and fresh ingredients rolled into a delicious hand-crafted sushi experience.
Prep Time: 45 minutes Cook Time: 30 minutes Total Time: 1 hour 15 minutes Yield: 4 rolls (24 pieces)
Ingredients:
For the Sushi Rice:
- 2 cups short-grain Japanese sushi rice
- 2 cups water
- ¼ cup rice vinegar
- 2 tablespoons sugar
- 1 teaspoon salt
For the Chicken Tempura:
- 1 pound boneless, skinless chicken breast or thigh
- 1 cup cake flour
- 2 tablespoons cornstarch
- 1 large egg
- 1 cup ice-cold sparkling water
- Neutral oil for frying (about 4 cups)
- Salt and pepper to taste
For Assembly:
- 4 half-sheets of nori seaweed
- Optional fillings: avocado, cucumber, cream cheese
- Dipping sauces: soy sauce, wasabi, pickled ginger
- Optional specialty sauces: spicy mayo, eel sauce
Instructions:
- Prepare sushi rice by rinsing thoroughly, cooking with water, and seasoning with the vinegar mixture.
- Slice chicken into strips, season lightly, and set aside.
- Make tempura batter by combining egg with cold sparkling water, then mixing in dry ingredients until just combined.
- Heat oil to 350°F and fry chicken in batches until golden brown and cooked through.
- Place nori shiny-side down on a bamboo mat, cover with an even layer of rice, leaving the top edge bare.
- Arrange chicken tempura and other fillings along the bottom edge of the rice.
- Roll up tightly using the bamboo mat, seal with water, and slice into 6 pieces per roll.
- Serve immediately with dipping sauces.
Nutrition Information (per 6-piece roll): Calories: 420 Protein: 18g Carbohydrates: 58g Fat: 12g Fiber: 2g Sodium: 580mg
Discover more Chicken Recipes
Ready to Roll!
There you have it—everything you need to create spectacular Chicken Tempura Rolls in your own kitchen! From the perfectly crispy tempura to the properly seasoned rice and expert rolling technique, you’re now equipped with restaurant-quality skills. The satisfaction of creating these beautiful, delicious rolls is matched only by the joy of customizing them exactly to your taste.
What are your favorite fillings to pair with chicken tempura in your homemade sushi? Did you try making the spicy mayo? I’d love to hear about your sushi-making adventures in the comments below!
If you enjoyed this recipe, please share it with your friends and family on social media—everyone deserves to know they can make amazing sushi at home!
Happy rolling!

